
 April 19, 2026
How to Remove Scratches
from Car Paint.
The Safe at Home Guide
Last updated. 19 April 2026. Reading time. 12 minutes.
The panic every car owner has had
You walk up to your car in the Phoenix Palassio car park and there is a long scratch running across the rear door that was not there this morning. Or you reversed a little too close to a pillar in Vibhuti Khand and now there is a scrape on the corner of the bumper. Or worst, you found a key mark across the bonnet of your Fortuner and have no idea who did it.
The first impulse is usually to reach for Google. The second is to try whatever hack Instagram or YouTube recommends. Toothpaste. Rubbing compound. Some polish you already have in the house.
Here is the problem. Not every scratch is the same, and not every DIY method is safe. The wrong method on the wrong scratch does not just fail, it makes the damage permanent by burning through the clear coat and exposing the colour layer. A scratch that could have been polished away becomes a panel respray.
This guide is the honest version. It teaches you a 10 second diagnostic test to classify your scratch depth, matches specific safe DIY methods to specific scratch levels, tells you exactly which household items to avoid, and warns you about the Lucknow summer paint correction risk that almost no other blog covers. By the end you will know what you can fix yourself and what needs a professional.
1. The 3 scratch depth levels every owner must know
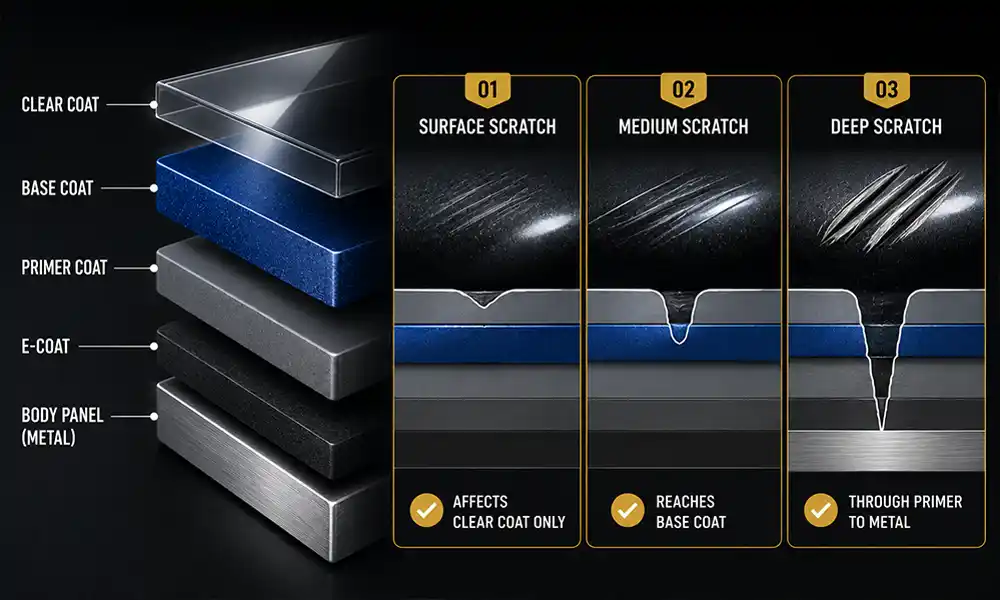
Your car's paint system has 4 layers stacked from top to bottom. Clear coat on top, base coat (the colour) underneath, primer below that, and the metal or plastic body panel at the bottom. Every scratch sits at 1 of 3 depth levels based on how far through this stack it has cut.
Level 1. Clear coat only
The scratch has cut into the transparent clear coat on top but has not reached the colour layer. These are the lightest and most common scratches. They usually appear as whitish or hazy lines that are more visible in bright sunlight. Causes include dust being wiped off with a dirty cloth, automatic car washes with worn brushes, light contact with shopping trolleys or bags, and tree branches.
Level 2. Base coat reached
The scratch has cut through the clear coat and into the colour layer underneath. You see a noticeable groove, and the colour inside the scratch is usually slightly different from the surrounding paint because the colour layer has been compromised. No white or grey showing through. Causes include sharper scratches from keys, stronger impacts from another vehicle's edge, or heavier contact with a gate or wall.
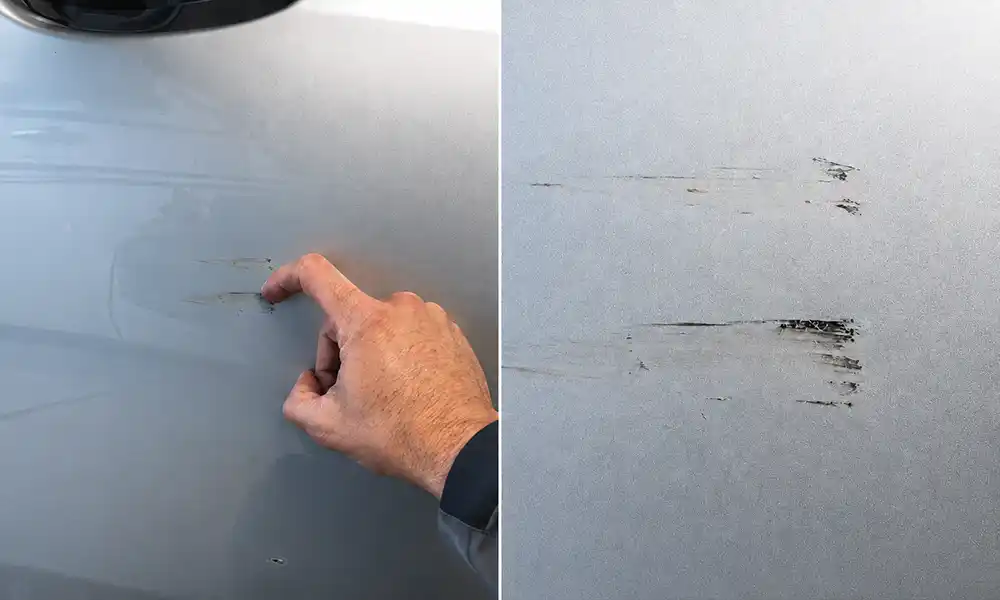
Level 3. Primer or metal exposed
The scratch has cut through the clear coat, the base coat, and the primer underneath. You see white, grey, or shiny metal showing through the groove. These are the deepest and most urgent scratches because any exposed metal will start rusting within weeks in Lucknow's humidity. Causes include deep keying, sharp metal corner impacts, and collisions.
Every DIY method has a scratch depth level at which it works and a level at which it causes damage. Getting the level right is the single most important decision in the entire process.
2. The 10 second fingernail and water test
These 2 simple tests take 10 seconds and tell you which level your scratch is at with 95 percent accuracy.
Test 1. The fingernail test
Run your fingernail across the scratch, perpendicular to its direction. Do not press hard. Let the nail glide naturally. Then note what happens.
If your nail glides across without catching on any edge, the scratch is Level 1. Clear coat only. If your nail catches lightly on the edge but there is no colour difference inside the scratch, the scratch is Level 2. Base coat reached. If your nail catches noticeably and you see white, grey, or silver inside the scratch, the scratch is Level 3. Primer or metal exposed.
Test 2. The water test
Pour a small amount of water over the scratch and watch closely.
If the scratch temporarily disappears when wet and reappears when the water dries, the scratch is Level 1. The water is filling the clear coat groove and refracting light the same way the surrounding clear coat does. If the scratch remains faintly visible even when fully wet, the scratch is Level 2 or higher. The colour layer or deeper has been disturbed and no water can hide that.
Combined diagnosis. Fingernail does not catch and water hides the scratch means Level 1. Fingernail catches lightly and water partially hides means Level 2. Fingernail catches strongly and water does not hide means Level 3.
These 2 tests are the foundation of every decision that follows. Do them before you try anything else.
3. Level 1 scratches. Safe DIY for clear coat only damage
Level 1 scratches are the category where DIY works well. About 85 percent of these can be completely removed at home with the right approach.
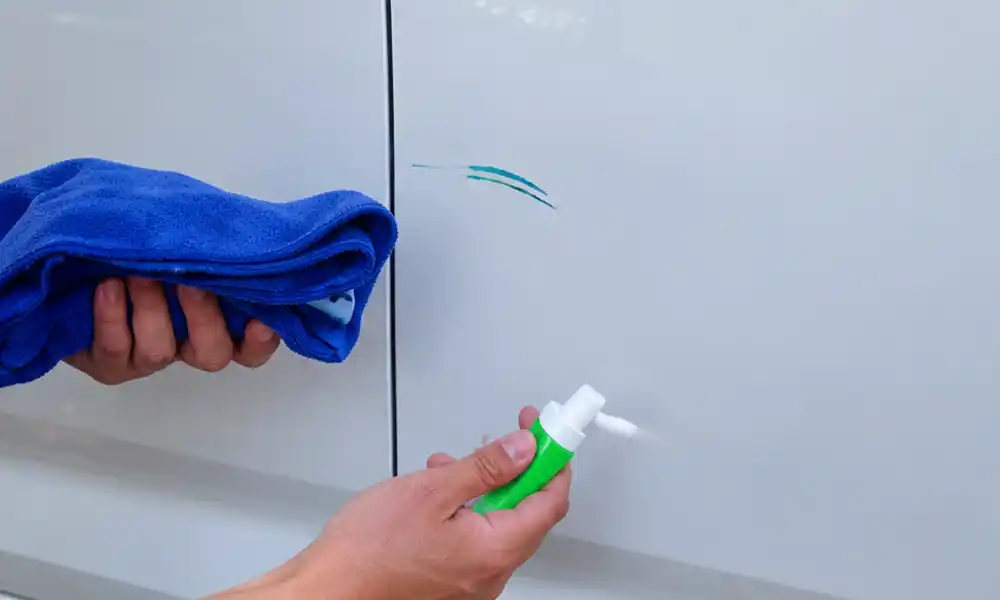
Method A. Detailing clay and polish
The safest starting method. Use a detailing clay bar with car shampoo as a lubricant to remove surface contamination across the scratch area. Then apply a fine finishing polish with a clean microfibre applicator in small circular motions for 30 to 60 seconds. Wipe clean with a second microfibre cloth. Inspect under natural daylight. Most Level 1 scratches reduce to invisible after this single step.
Method B. Rubbing compound by hand
For slightly deeper Level 1 scratches that did not fully respond to polish. Use a rubbing compound (a mildly more aggressive polish) with a clean microfibre applicator. Apply in small circular motions with light to medium pressure for 60 to 90 seconds. Wipe clean. Re-inspect. Most will clear at this stage. If the scratch persists, stop. Do not escalate further by hand as you risk creating swirl marks.
Method C. Machine polishing with a dual action polisher
If you own or can borrow a dual action polisher (a beginner friendly machine polisher) this method works on Level 1 scratches that hand methods cannot fully clear. Use a medium cut compound with a soft foam pad, set the polisher to a moderate speed (3 or 4 out of 6), and work in a small area at a time with slow overlapping passes. Follow up with a fine finishing polish to restore the gloss. This method clears 95 percent of Level 1 scratches completely.
Lucknow specific tip for Level 1 work
Do all polishing work in shade with the panel cool to the touch. Polishing in direct sun or on a hot panel causes the polish to flash dry too quickly, which creates haze marks and may require additional cleanup. This matters more in Lucknow summer when surface temperatures cross 55 degrees Celsius even in late afternoon.
What you need to spend
A starter kit for Level 1 work costs around 2,000 to 4,000 rupees and includes a quality finishing polish, a rubbing compound, a pack of clean microfibre cloths, and a detailing clay bar. This is a one-time purchase that handles multiple scratch events.
4. Level 2 scratches. The risky middle ground
Level 2 scratches sit in the most difficult category for DIY. Some can be improved at home. None can be fully removed at home. All carry real risk of making the scratch worse if the method is wrong.
What DIY can actually achieve at Level 2
The goal at Level 2 is improvement, not complete removal. You are trying to round off the hard edges of the scratch, reduce its visibility, and seal the compromised colour layer so moisture cannot get underneath. A Level 2 scratch that started at 10 out of 10 visibility can be reduced to about 3 out of 10 visibility at home, but never to zero.
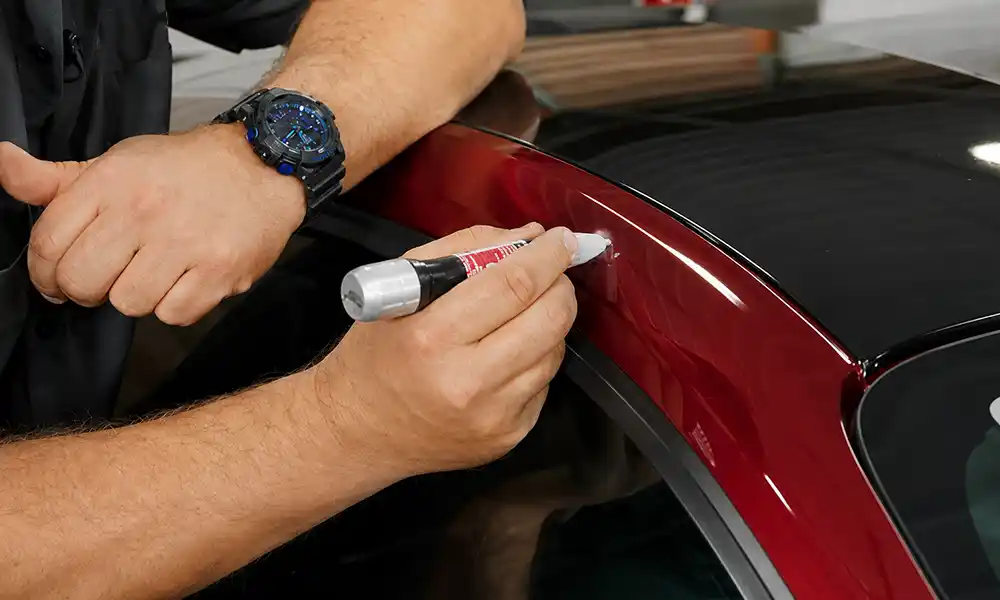
Method A. Touch up paint pen
The safest Level 2 DIY. Buy a manufacturer specific touch up paint pen matched to your car's colour code (visible in the RC book or the door jamb sticker). Clean the scratch with rubbing alcohol. Apply a very thin layer of paint inside the groove only using the fine tip of the pen. Let dry 15 minutes. Apply a second thin layer. Let cure overnight. The next day, apply a drop of clear coat from the kit. Let cure 48 hours. Gently level the area with 3000 grit wet sandpaper used with water, then polish with fine finishing polish.
The result. The scratch is filled and sealed. It remains faintly visible under close inspection but is significantly less obvious from 1 metre away. The paint is no longer vulnerable to moisture ingress or rust. Good enough for daily driving purposes on older cars.
Method B. Scratch repair kit from Amazon
Better Amazon kits include primer, colour paint, clear coat, and abrasives in a single package. The process is similar to Method A but with more steps. Expect 2 hours of careful work across 2 days for the curing. Success rate depends heavily on the colour match accuracy of the kit. For common Indian paint colours like silver, white, and black, match is usually acceptable. For metallic or pearl finishes, match is almost never right and the repair becomes visible rather than invisible.
What to avoid at Level 2
Rubbing compound on a Level 2 scratch. The abrasive in the compound will remove surrounding clear coat and expose more of the compromised colour layer, making the scratch larger and more visible. Heavy machine polishing on a Level 2 scratch. Same reason.
The single biggest mistake at Level 2. Trying to "polish harder" to remove the scratch. You cannot polish out a scratch that has gone through the clear coat. Any additional abrasion just damages the surrounding area.
The honest assessment
Level 2 is where Colomoto sees the most DIY damage come through the door. Owners applied rubbing compound to a Level 2 scratch, made it worse, tried more compound, made it much worse, then brought the car in for a full panel respray that would not have been necessary if they had stopped at Level 1 methods.
If you are at Level 2 and the scratch is on a visible panel like the door or bonnet, the honest answer is to use a touch up pen for protection and accept the visible scratch, or send the car in for professional paint correction. Anything in between usually goes wrong.
5. Level 3 scratches. Why DIY almost always fails
Level 3 scratches have reached the primer or the bare metal. These need professional attention and the only DIY steps are protective, not restorative.
Why DIY cannot fix Level 3
A proper Level 3 repair requires removing any rust if present, applying a fresh primer coat, applying a matched colour base coat, applying a clear coat, and blending the transition into the surrounding panel. This needs a dust free environment, spray equipment, colour matching to the surrounding ageing paint, and curing between coats. None of this can happen in your driveway.
The one DIY step worth doing at Level 3
Protection until the professional repair. Clean the scratch with rubbing alcohol. Apply a very thin layer of touch up paint inside the scratch purely to cover the exposed metal. This does not repair the scratch, it just prevents rust from starting while you book a studio appointment. Rust on exposed metal in Lucknow humidity can begin within 2 to 3 weeks. Do not let the scratch sit untreated.
Why Level 3 gets worse with time
Every week an untreated Level 3 scratch sits exposed, moisture enters the primer and metal layers. Rust spreads sideways under the surrounding paint. What starts as a 5 cm exposed metal line becomes a 15 cm area of blistering paint within 3 months in Lucknow's climate. A professional repair booked in the first week is a small panel job. A professional repair booked after 3 months is a large panel job.
The honest fallback
The right call for Level 3 is to protect the metal with a temporary touch up, book a professional studio within 2 weeks, and accept that this is not DIY territory. Colomoto handles Level 3 scratches as panel level paint work with proper primer, colour match using our spectrophotometer, and clear coat blending into adjacent panels.
Cost context for professional scratch repair is covered in our car dent repair cost guide since scratches and minor dents often use similar panel repair pricing.
6. The toothpaste myth and 4 household items to avoid
The single most common DIY car scratch advice on Indian Google is toothpaste. It is also the most wrong.
Why toothpaste is mostly useless
Toothpaste contains very mild abrasives designed for removing plaque from tooth enamel. Tooth enamel is softer than car clear coat. The abrasives in toothpaste are calibrated for enamel, not automotive paint. The result is that toothpaste does almost nothing to a real car scratch. At best it slightly polishes the surrounding surface, making the scratch appear marginally less contrasted for a few days.
What toothpaste does wrong
The abrasive profile in whitening toothpastes is harsher than in regular toothpastes. Some whitening formulas can create haze marks on clear coat that are visible in bright daylight and are difficult to remove without proper polishing. In other words, toothpaste is more likely to leave its own mark on your car than remove the existing scratch.
4 other household items to avoid
- Brasso or metal polish. Far too aggressive for automotive paint. Will remove clear coat and expose colour layer. Do not use.
- Petrol, thinner, or nail polish remover. Will strip wax, clear coat, and in some cases colour paint. Even a small amount can cause permanent damage. Do not use.
- Baking soda paste. The abrasive profile is irregular and unpredictable. Some batches produce haze, others do nothing. Not worth the risk.
- Any household scouring powder or kitchen cleaner. Far too abrasive. Will create new scratches much worse than the one you started with.
The rule is simple. If it is not specifically made for automotive paint, do not put it on automotive paint. The extra 1500 rupees spent on a proper finishing polish and microfibre cloths is worth many times that in avoided damage.
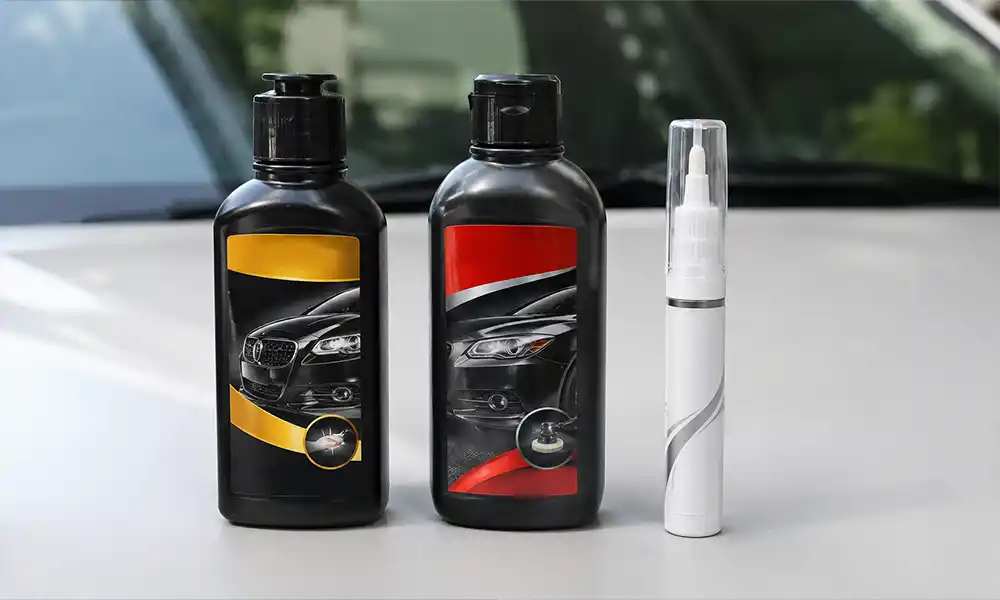
7. 3 commercial products that actually work in India
These 3 product categories are worth having in your garage for DIY scratch work. All are available on Amazon India or through local auto accessory shops across Lucknow.
Product 1. A quality finishing polish
For Level 1 clear coat scratches. Look for brands like Meguiar's Ultimate Polish, Chemical Guys V38, Sonax Perfect Finish, or 3M Perfect-It Machine Polish. Price range 1200 to 2500 rupees for a 500 ml bottle which lasts for multiple scratch events.
Product 2. A rubbing compound
For slightly deeper Level 1 scratches and for preparation before touch up paint on Level 2. Meguiar's Ultimate Compound, 3M Rubbing Compound, or Chemical Guys VSS. Price range 1000 to 2000 rupees for 500 ml.
Product 3. A manufacturer specific touch up paint pen
For Level 2 protection. Every major Indian manufacturer (Maruti, Hyundai, Tata, Mahindra, Honda, Toyota) offers touch up pens through their service centres matched to specific paint codes. For BMW, Mercedes, Audi, Porsche, and other premium imports, touch up pens can be ordered through authorised service centres or specialist suppliers. Price range 500 to 2500 rupees per pen depending on brand and colour rarity.
What you do not need to buy
Machine polishers, aggressive cutting compounds, and professional grade paint correction systems. These tools are designed for full vehicle paint correction and require skill to use without damaging the clear coat. A first time user with a cutting compound and a machine polisher will almost certainly burn through clear coat on a panel edge, which turns a small DIY project into a full panel respray. Stick with hand application of finishing polish and rubbing compound unless you have specific training with a polisher.
8. The Lucknow summer paint correction risk
Almost no other blog writing about car scratch DIY covers this. In Lucknow's summer from late April through June, attempting paint correction is significantly more risky than in winter.
Why heat matters
Clear coat softens slightly at elevated temperatures. The clear coat on a car parked in Lucknow summer afternoon sun reaches surface temperatures of 55 to 65 degrees Celsius. At this temperature, polishing compounds cut through clear coat much faster than they would on a panel at 25 degrees. A rubbing compound that removes a safe thin layer of clear coat in winter can burn straight through the clear coat in summer heat.
The practical consequence
A scratch that would have been a 20 minute polish job in February can become a burn through the clear coat in May, exposing colour layer and requiring full panel respray. This is the number 1 cause of self inflicted serious paint damage we see at Colomoto between April and July.
The correct Lucknow approach
Do all DIY paint correction work indoors or in full shade. The panel must be cool to the touch before starting. Ideally morning before the sun is strong, or evening after 6 PM. Never polish a hot panel. If the panel is warm enough that rubbing it with a compound feels hot on your hand, stop and wait.
The alternative in summer
In peak summer (May and June) the safest approach is to postpone any Level 1 polish work until October or to bring the car to a climate controlled studio. The 4 weeks of delay are much better than a burn through that requires professional intervention. For Level 2 touch up pen work, the curing time is also affected by summer heat. Apply touch up paint in the early morning before temperatures rise, and let cure in shade for the full 48 hours.
Lucknow climate and paint work issues are covered in more depth in our matte vs gloss car paint guide and our car painting timeline guide.
9. When to stop DIY and call a professional
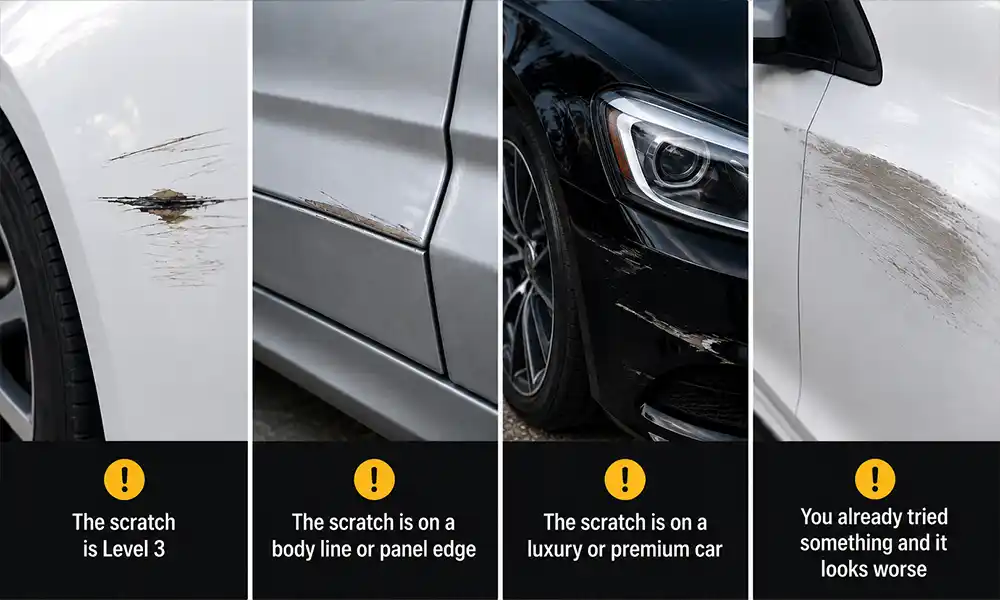
The 4 signals that mean DIY is not the right answer for your scratch.
Signal 1. The scratch is Level 3
Any visible white, grey, or silver inside the scratch means the primer or metal is exposed. DIY at this level is protection only. Book a studio for proper repair.
Signal 2. The scratch is on a body line or panel edge
Body lines and panel edges have thinner clear coat than flat panel areas because the spray application spreads thinner at edges during factory painting. DIY polishing on these areas cuts through the clear coat faster than expected and exposes colour. These areas should always be handled professionally regardless of scratch depth.
Signal 3. The scratch is on a luxury or premium car
BMW, Mercedes, Audi, Porsche, and equivalent brands use specific paint systems that do not respond predictably to generic Indian market polishing compounds. The paint is also much more expensive to repair if DIY goes wrong. For premium cars, DIY is not the right path even for Level 1 scratches. Send to Colomoto or a premium studio every time.
Signal 4. You already tried something and it looks worse
If your first DIY attempt made the scratch more visible, do not try a second method. Each additional attempt compounds the damage. Bring the car in and explain exactly what you tried. We can work backwards from DIY damage to restore the paint, but the more attempts that were made, the more extensive the restoration becomes.
The honest position. Level 1 scratches are DIY territory for most owners. Level 2 scratches are borderline and often better handled professionally. Level 3 scratches are always professional work. A good Lucknow owner saves time and money by recognising which category they are in before starting.
At Colomoto we offer free scratch assessment via WhatsApp. Send 4 photos of your scratch to +91 7388800192 with a description of how it happened. We respond within the hour with a level classification, a recommendation on whether DIY is viable, and if not, an approximate price band for professional repair.
10. Frequently asked questions
First identify the scratch depth using the fingernail and water test. For Level 1 clear coat scratches use a fine finishing polish or mild rubbing compound. For Level 2 scratches use a touch up paint pen for protection. For Level 3 scratches only temporary touch up is DIY appropriate and professional repair is needed.
No. Toothpaste is designed for tooth enamel which is softer than automotive clear coat. At best toothpaste provides a marginal temporary visual improvement. At worst whitening toothpastes leave haze marks on clear coat that require professional polishing to remove. Use a proper finishing polish instead.
Run your fingernail perpendicular to the scratch without pressing hard. If the nail glides over smoothly, the scratch is Level 1 clear coat only. If the nail catches lightly, the scratch has reached the base coat (Level 2). If the nail catches strongly and you see white, grey, or silver, the scratch has reached primer or metal (Level 3).
No. Rubbing compound works on Level 1 clear coat scratches only. Using rubbing compound on Level 2 scratches removes surrounding clear coat and exposes more of the compromised colour layer, making the scratch more visible. Using rubbing compound on Level 3 scratches does nothing because the clear coat is already gone.
No. A touch up pen fills the scratch groove with matched paint which protects the exposed colour layer or metal underneath but leaves the scratch visible under close inspection. The goal of a touch up pen is protection and visibility reduction, not invisible repair. Invisible repair requires professional paint correction or panel respray.
Level 1 hand polish work takes 20 to 45 minutes per scratch. Level 2 touch up pen work takes 2 hours spread across 2 days to allow for proper curing. Level 3 temporary protection takes 15 minutes but is not a final repair.
Not in direct sunlight and not on hot panels. Clear coat softens at high temperatures and polishing compounds cut through it much faster in heat. Do all polish work in full shade with the panel cool to the touch. Ideally early morning or after 6 PM in summer months.
Improper washing with dirty cloths causes the majority of Level 1 scratches. Automatic brush car washes with worn brushes cause swirl marks. Shopping trolleys in car parks cause Level 1 and Level 2 scratches. Key scratches from vandalism cause Level 3 scratches. Roadside objects like tree branches and construction debris cause mixed depth scratches.
Ceramic coating makes very minor swirl marks less likely because the coating is hydrophobic and reduces the chance of a dirty cloth dragging grit across the paint. Ceramic coating does not prevent scratches from sharp objects, keys, or trolley impacts. A scratch that would have damaged normal paint will still damage ceramic coated paint. The protection is modest, not absolute.
Level 1 clear coat scratches that need professional paint correction typically cost in the lower 4 figure range per panel. Level 2 scratches needing partial panel work run in the mid to upper 4 figure range. Level 3 scratches needing full panel respray run in the 5 figure range. These ranges apply to premium studio work. Authorised service centres charge higher and local garages lower, with quality tradeoffs covered in our car painting near me guide.
Yes. Any Level 3 scratch that has exposed metal will start forming rust within 2 to 3 weeks in Lucknow's humidity. The rust spreads sideways under the surrounding paint over months, turning a small exposed scratch into a larger area of blistering paint. Protect Level 3 scratches with a temporary touch up within the first week and book professional repair within the first month.
Call or WhatsApp on +91 7388800192. Email info@colomoto.in. Send 4 photos of your scratch via WhatsApp for a preliminary depth classification and DIY suitability check. Or visit us directly at 323, Ahimamau, Sultanpur Road, Lucknow any weekday or Saturday between 10 AM and 7 PM for an in person inspection and free written quote.
Helpful resources
For further reading on car scratch diagnosis and safe DIY methods, these sources are useful.
Resources We Used
This guide is based on industry-standard knowledge, DIY scratch repair best practices, and real world outcomes from the Indian market. Here are some trusted sources if you want to explore further:
- Team-BHP Indian owner DIY experiences with scratch removal products across different cars and climates, for real world testing in Indian conditions.
- Dr. Beasley's Detailed technical guidance on scratch depth classification and paint correction safety, for the science behind the diagnostic tests.
- Sikkens by AkzoNobel Manufacturer paint system documentation on clear coat thickness and ageing, for understanding the paint layer stack.
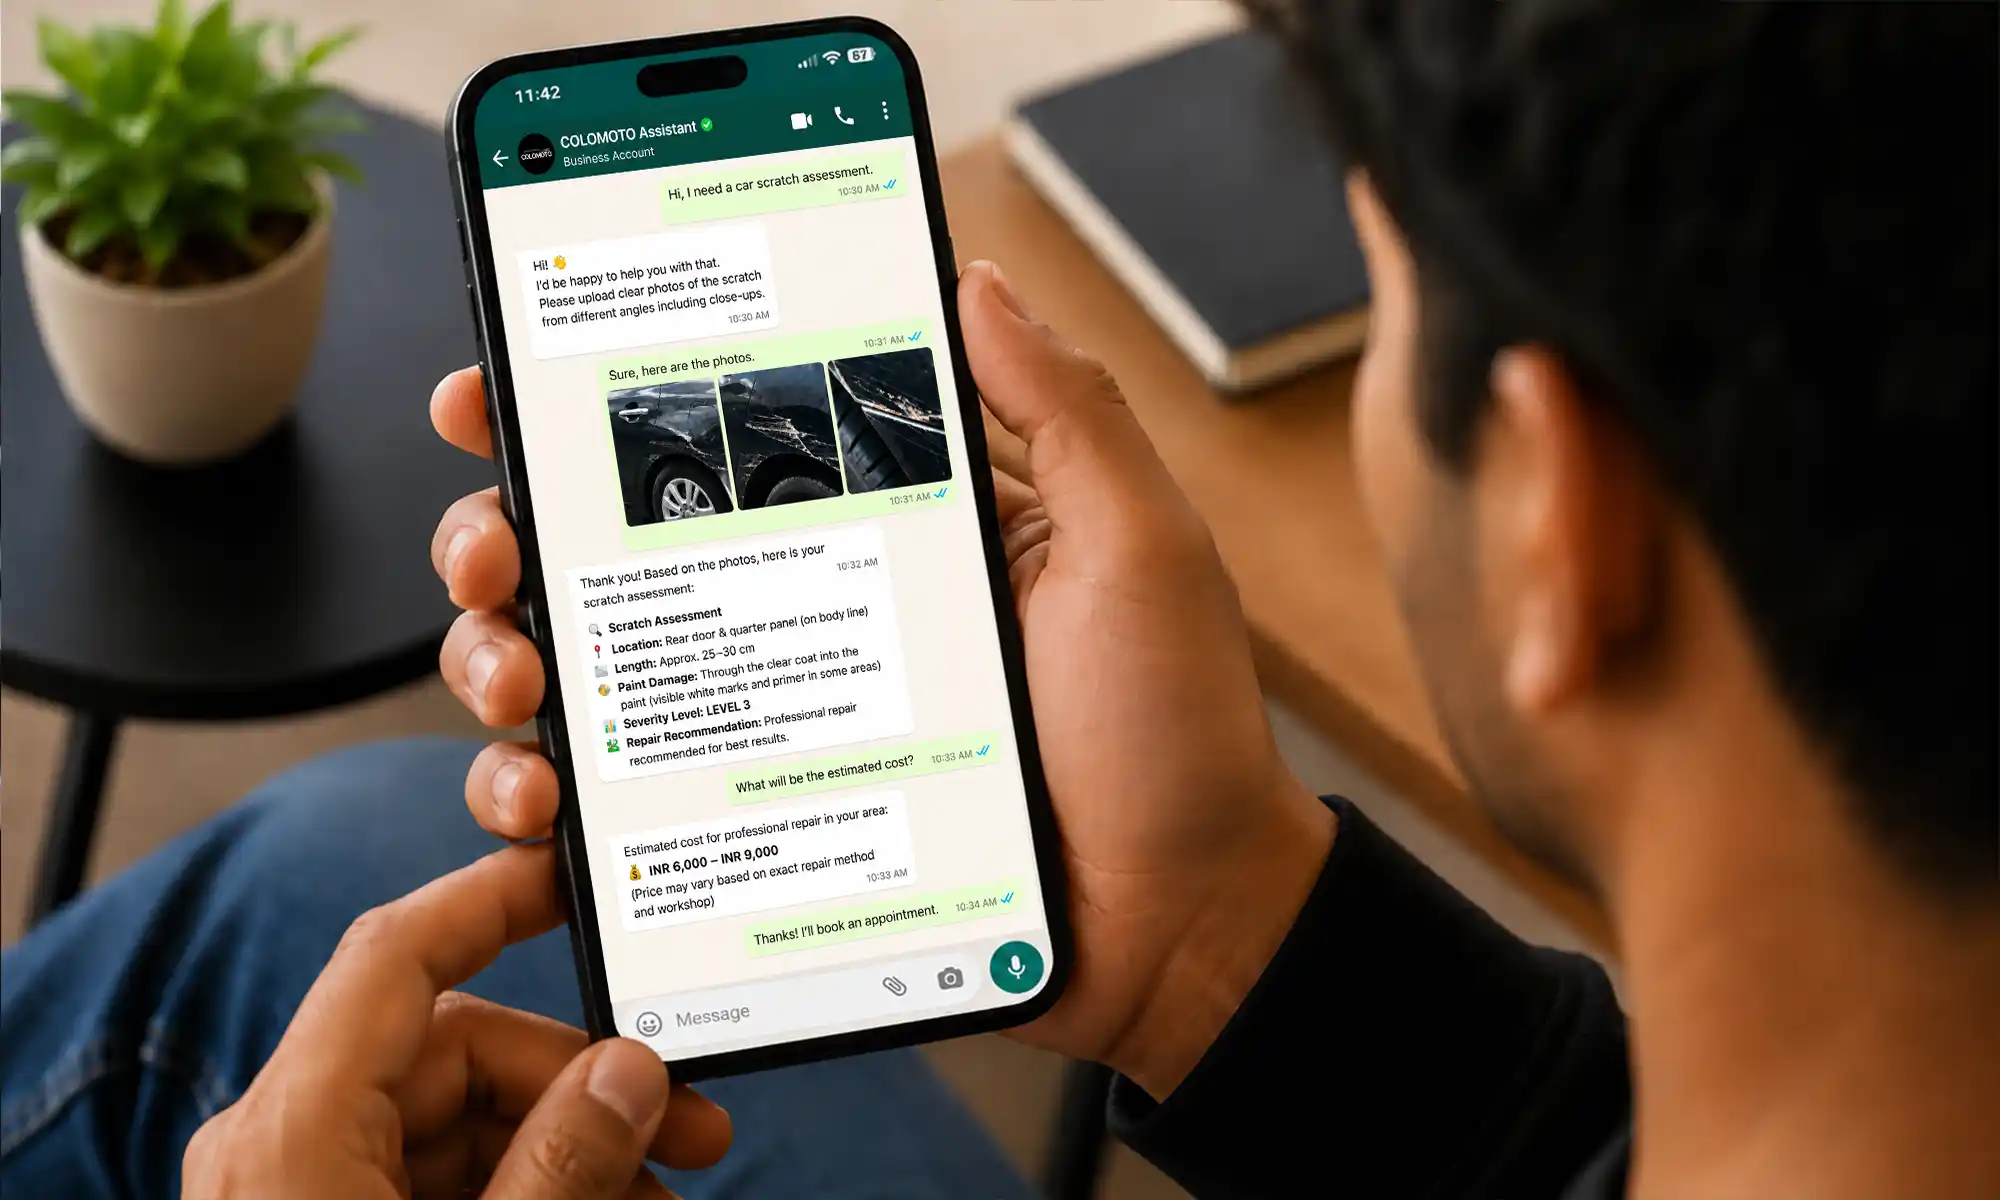
Ready for a proper scratch assessment
Send 4 photos of your scratch via WhatsApp to +91 7388800192 for a free preliminary depth classification. We will tell you honestly whether this is a DIY job, a protected DIY job pending professional repair, or a direct professional repair. Visit 323, Ahimamau, Sultanpur Road, Lucknow or email info@colomoto.in with any questions.